Wednesday 18 March 2015

Home Tools You Never Knew You Needed

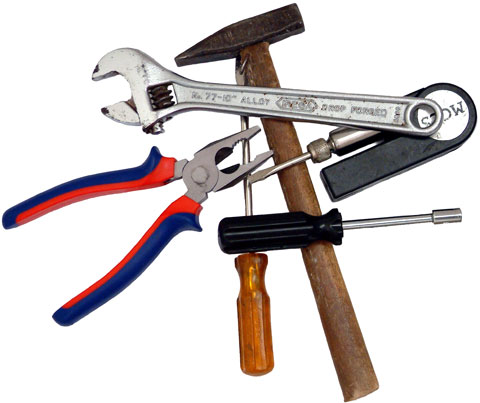
When it comes to home improvement, a well-equipped toolbox is essential for completing jobs around the home, from hanging a picture frame to putting together the furniture or doing major home improvements.

Besides having the basic tools- hammer, knives, pliers, etc., you should be prepared for everything by adding a few extra tools into the mix. These tools are used in all sorts of projects like painting doors, building your own table, etc.

Below are listed 5 such essential tools probably you might have never heard of.

A laser level:
A laser level is a control tool consisting of a laser beam projector that emits a laser beam to keep things perfectly horizontal while cutting beams or nailing in shelves, mirrors and frames. It also emits a vertical beam which helps for plumbing installations.

A non-contact voltage tester:
This gadget is the safest way to check whether the outlets are safe to work with, without touching the wires.  Plug the device into the outlet to make sure the electric current isn’t running. The tester lights up or make noise when it comes close to a live (hot) wire.

A paint sprayer:
Spray an entire gallon of paint in just nine minutes with this little guy!Get a smooth coat on your wall, furniture or door. It also sprays sealers and stains. Sprayers can create a mirror-like finish on furniture or cabinets because these atomize liquid into a fine mist.

A stud finder:
A stud finder is an amazing metal detector that can help you know if there’s a metal in the ceiling or behind the wall, before you start hammering.

A pull saw:
If you feel uncomfortable and heavy to work with a saw, this is an alternative for you. Pull saws can be used on wood blocks, hard-to-reach places and lumber. These have tiny teeth, a sharp and easy slice to cut when you pull the tool towards you.
 

5 Creative Faux Finish Ideas For Your Walls

Faux painting has now a days become one of the favorite choices of homeowners. This amazing technique makes your home look more colorful, attractive and eye-catching. Read on to learn some of the most creative ideas.

Have you been looking for some creative and unique way to transform your walls into something more attractive? Then, try out faux finishing this time. This art of using paints to give out a different  appearance to look like materials such as metal or wood or some architectural style, will surely offer a new look to your home. Find the seven unique ideas here;

1. A touch of your most loved fabrics/ materials

The best addition to your wall can be the look you love most. It could be anything, the rough look of sea-grass or the smoothest leather. So, all you need to do is search for the fabrics or material you wish to see on your walls. Once decided, you can try it on a smaller section of the wall. If it works well, go ahead!

2. Your ceiling can add more

The ceiling of your room is undoubtedly one of the best places to apply faux finish. Adding a perfect color or texture can change the entire look of your room. While you are selecting the technique, make sure it goes well with your decor.

3. Old is gold:

There are many homemakers, who love that Mediterranean interior appeal greatly. For them, faux finish is the only solution. You can make use of distressing, graining, and sponging methods to bring that ‘age’ appeal to your walls. It is a perfect idea for your ceilings, especially in dining rooms and bedrooms.


4. Plaster to bring a rustic appearance to your room

Years back, plaster was considered as one of the best material for walls. The high durability and unique look of plaster attracts the homeowners even today. If you also love that rustic appeal of plaster, you can go for special primer paint and plaster faux finish.

5. Add ‘outdoor’ to the inner walls

This is another gorgeous way to add life to your walls using faux finishes. It is quite simple. You can mimic a number of outdoor things like trees, rocks, and much more with creative concretes or plasters! 

The best part of employing faux finishing is that there are enormous options to try. You can paint it the way you like, and get the most stunning and innovative look for your walls! 

Contact Fortune Restoration expert's to know more about faux painting. 

Tuesday 10 March 2015

How to repair brick Chimneys


Brick or masonry chimney has long life if they are constructed properly. But because of their nature, they get corroded and damaged with time and weather.Therefore, they need to get repaired, once you learn about their damage and decay. 

The water damaged or crumbled brick within a chimney causes  the structure to lose some or full of its structural integrity. As such, the structure should be examined and assessed to find the scope of the work to be done. For the solution, either you can get the damaged brick cut individually or repair and rebuild the structure, depending upon your evaluation.


Expert masonry results in long-term, high quality chimney repair. Therefore, you should hire a professional like masonry contractors Lincoln Park, who with their experience and knowledge, fulfill your purpose.

Chimney Rebuilding Procedure: 

·      Assessment: Determining the extent of the mortar damage and removing the damaged one without causing further damage is the main challenge of chimney rebuilding. For assessment, you will need to consult a professional, definitely. An expert starts the examination with visual inspection followed by the inspection using specialized tools such as  metal scrape. After the determination is made, damaged or deteriorated mortar joints should be removed.

·      Removal of damaged mortar joints: While removing the deteriorated mortar joint, an important thing is to remove the joint to an appropriate depth without  causing extra brick damage. The new mortar should be prepared once the old mortar is removed. Make sure that the new mortar composition is as same as the existing mortar or else there will be more chances of premature mortar corrosion.

·      Applying new mortar: The new Mortar is then placed between the brick using finishing tools made of steel with a convex tip. The tool is then run over the newly applied mortar to match the shape of the mortar used on the older joints.

·      Applying sealant:At the end, apply a water resistant sealant layer on the mortar to prevent it from water penetrating in your chimney. It will help in extending the life of your mortar joints.