

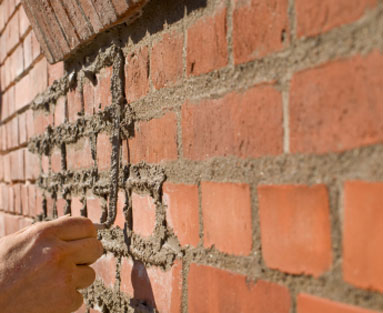
Over a period of time, mortar beings to
deteriorate. No matter how effectively you have applied masonry on the onset,
with excessive impact of elements, especially water and heat, tend to break the
mortar joints. Tuckpointing or masonry repair is only alternative to repairing
cracked and deteriorating mortar, here is how you can do it yourself.
Masonry contractors Park Ridge and tuckpointing
contractors Park Ridge suggest that deteriorating and cracking masonry doesn’t
just look unsightly, it also diminishes the integrity of the area. Tuckpointing contractors Hinsdale one of the reckoned tuckpointing contractors in Chicago,
advocate that damaged mortar joints allow water and moisture to seep into the
building. To avoid any such problems, painting contractors Hinsdale suggest
that you should ensure that the mortar joints are properly tuckpointed before
any painting project.
Painting contractors Lakeview and painting contractors
Lincoln Park suggest that mortaring or tuckpointing should be avoided in
extreme weather conditions, since mortar does not set properly in such
conditions. Then here are a few tip on how you can simply tuckpoint the
deteriorating mortar on the outside of your home.
- Grind (chip) off all the loose, breaking and cracking mortar using a cold chisel and hammer. Do not injure the brick work, but remove all the deteriorating mortar to an uniform depth (ideally an inch deep)
- You must wear safety goggles when working with chisel, hammer on the broken mortar
- You can purchase premixed mortar or you can set out to create your own mix. Ensure that you let the prepared mortar to mix and set for about five minutes before applying
- Apply the mortar evenly amid all the joints and allow it to set firmly. When the mortar has set up well (in about a week’s time), you can then use high-quality silicon or acrylic sealer over the surface


0 comments:
Post a Comment