

Tuckpointing of chimneys should be DIY only if the homeowner is absolutely sure of the job.
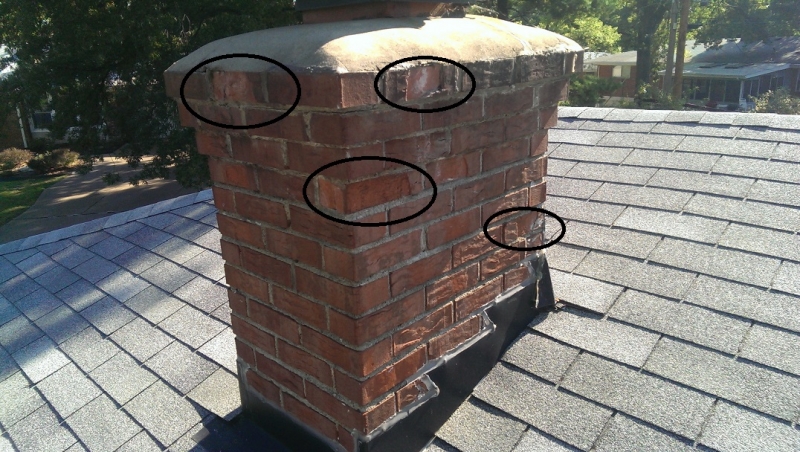
Chimneys made from brick and mortar always decays over a period of time. Their repair should be done on time, to avoid a situation where the bricks dislodge completely.
Chimneys made from brick and mortar always decays over a period of time. Their repair should be done on time, to avoid a situation where the bricks dislodge completely.
Tuckpointing contractors in Lincoln Park advice that the balance of a person doing tuckpointing should be stable at all times. The DIY instructions for Chimney Tuckpointing are-
1.Brush the loose mortar on the chimney with a stiff wire brush. Remove all pieces that are crumbling and damaged by using a screwdriver or a tuckpointing tool.
2.Make a mixture of mortar and water in a bucket, by following the manufacturer’s instructions closely. A fortifier can be added to make it extra strong. The consistency of the mortar should be such that it sticks to the trowel when upside down.
3.Now fill a mortar pail or a piece of wood with a few handfuls of mortar. Dampen the areas identified for tuckpointing with a spray bottle. Concentrate on a small section at one time.
4.Now using a trowel push mortar in between the joints, starting from one side. Smoothen out the mortar after pushing it to give it a smooth finish.
5.Now repeat this procedure on another section. Spray the entire chimney once the mortaring is complete. Allow the mortar to set and dry completely. If possible the chimney should be subjected to spraying regularly for the next couple of days. The mortar will have a stronger bond by doing so.


0 comments:
Post a Comment